")
")
TANKS, THE MAKING OFF...
 Building a control line tank, above all the first has never been a piece of cake. We could use some other objects convert them into fuel tanks, we should gain time and energy. But the mystry of the soldering and the interest for our young modelers convince us of the contrary. Our method is not a revolution, and has been improved during our building sessions 10 years ago.
We use tinned sheet iron of 30/100mm thick, or heated brass in the same thickness. This materials are usually found in modeling stores.
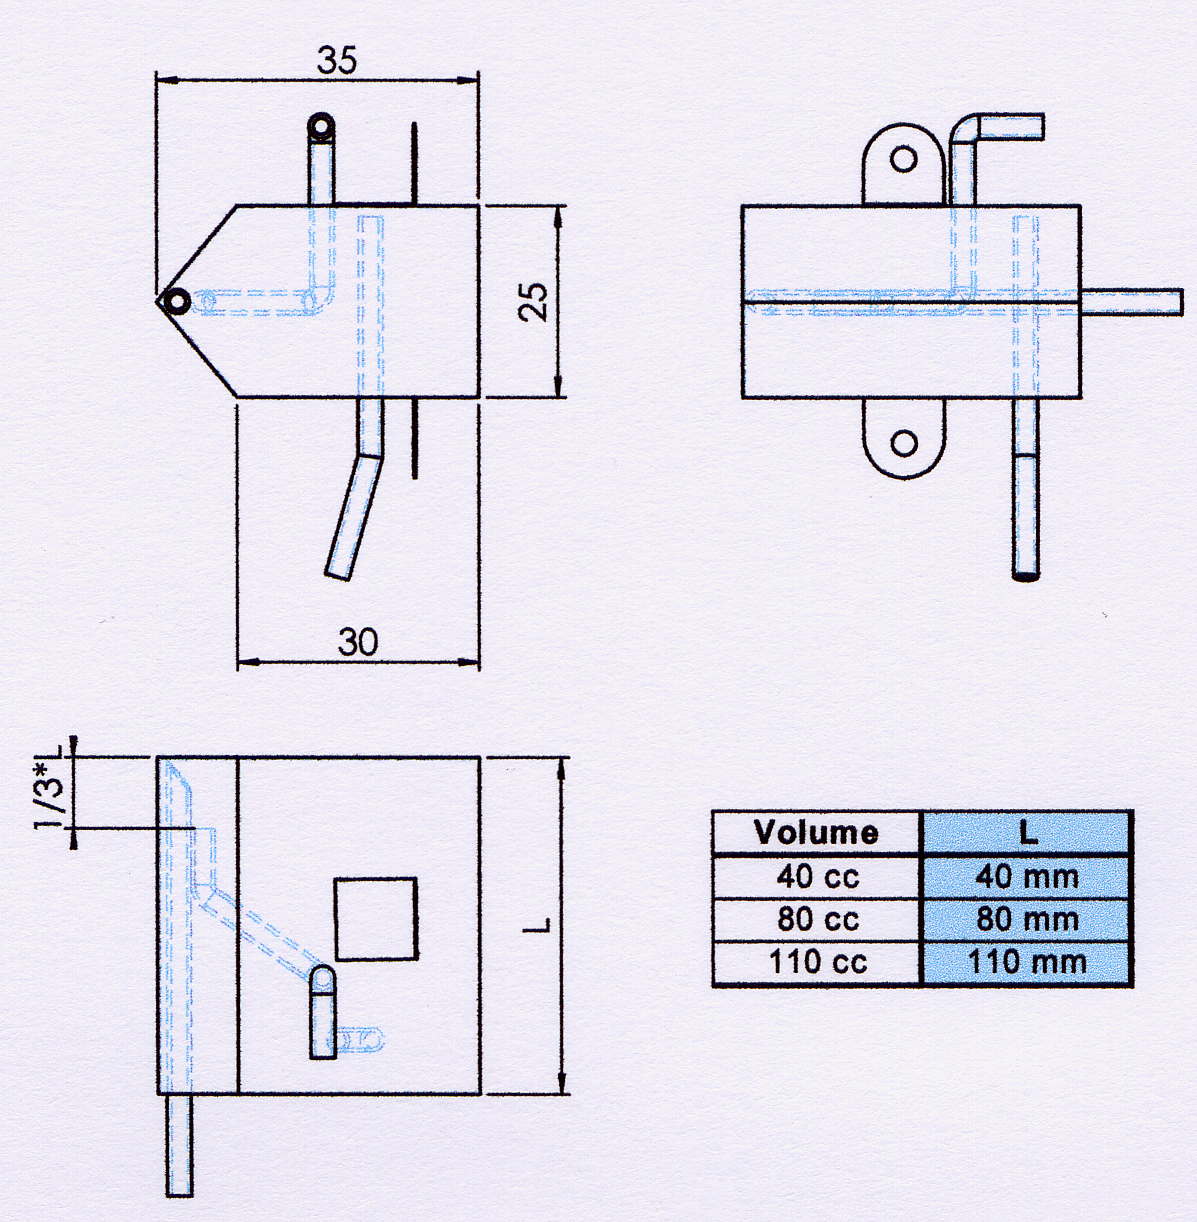
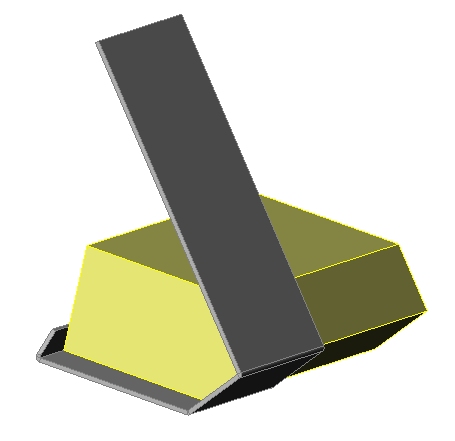
The shaping is made around a shaped piece of wood, a master that can be reused and allow us to build some tanks up to 110cm³. This master piece can take a long time to be handmade. If you know a carpenter he certainly can help you and the task will take only minutes, and give a perfect shape. You can also use aluminium, that can have a longer life even in clumsy hands.
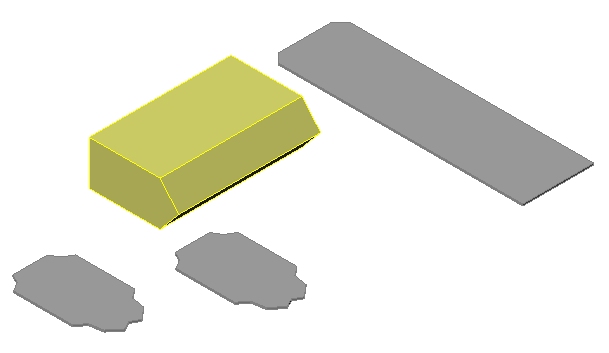
The marking of the 3 pieces for the body of the tank is the first job we ask to our beginner. It is good opportunity for him to review some geometry courses, and the young discover that some school lessons can be usefull in everyday life or during leisures. Before using any etching needle we ask for a drawing on a paper sheet that could be reused for another tank, the best could be a copy book that can be used during the building of the model.
The drawing can now be done on the metal sheet. The quality of the folding and the final shape of tank depend on the quality of the drawing. Parallels must be parallels, and perpendiculars must be upright. The cutting is simply made with scissors that are only used for this task. You must have to be mindful by following the lines, the job can be welldone by a ten years old kid.
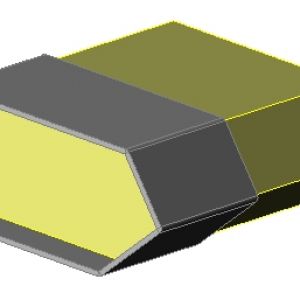
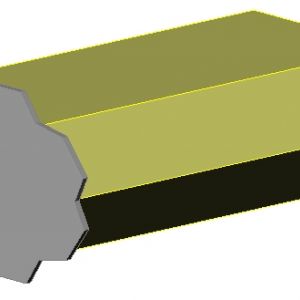
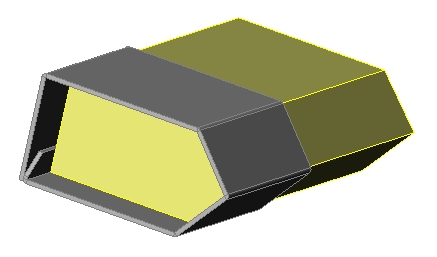
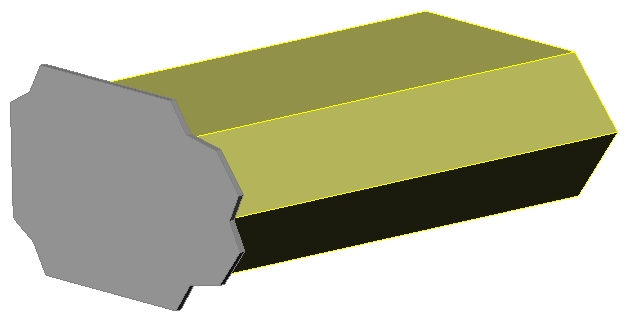
Now it's time to fold... The drawings from Fabrice are easy to understand and show the different steps for the folding.
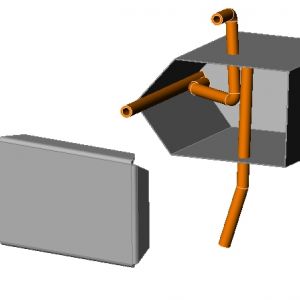
Folding the body of the tank :
The tank consists in a "box" and two ends. First, we fold the sheet that will become the body of the tank. The first folding is for the strip (9 0°) , then roll around the sheet using the master shape and carefully insist on the foldings using a hard wood piece. You can now close the shape by soldering the strip with tin under or on the last face of the tank.
Soldering is not as easy as it seems. Firstly you have to explain to the young modeler that he can hardly burn himself. Tecnically, it's usefull to scrape the parts that will be soldered in order to remove the oxidation and the greases that could avoid the solder tu run properly. It's very important to understand that the metal must heated in order to make the tin flows between parts. Some scraping paste, a well positionned tin wire and the solder is perfect.
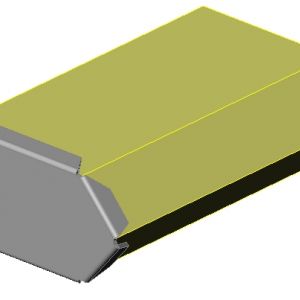
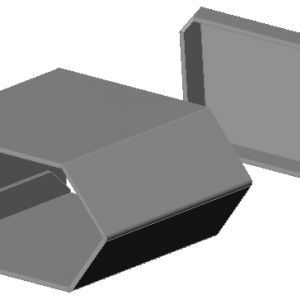
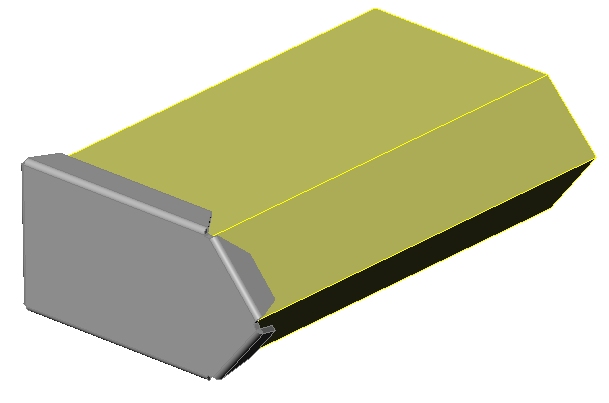
Folding the ends :
If you choose ti fit in the ends with strips out, you can use the wooden shape to form them. If you choose to put the strips inside you'll have to do the job with a flat grip, this task is very formative. The first end is now ready to be soldered in place .
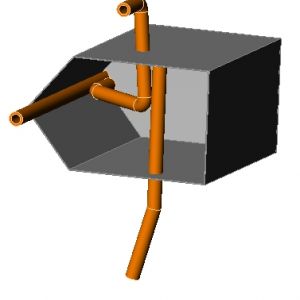
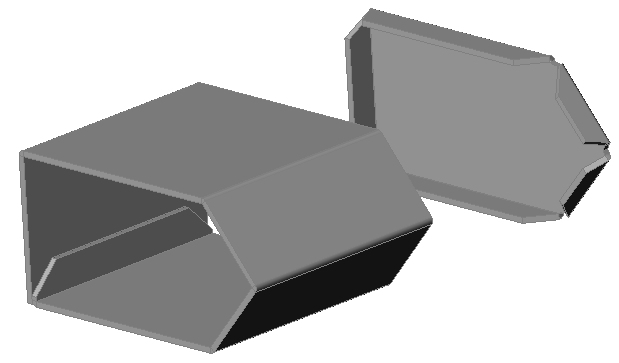
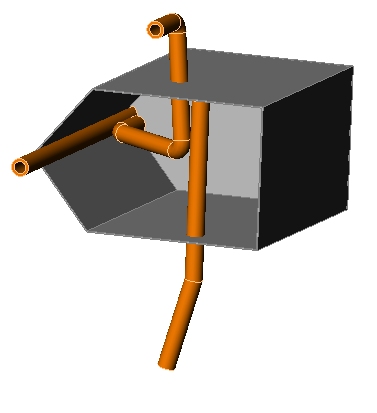
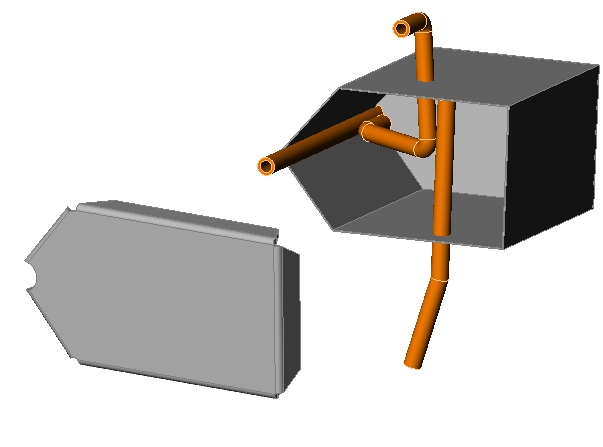
The tubes :
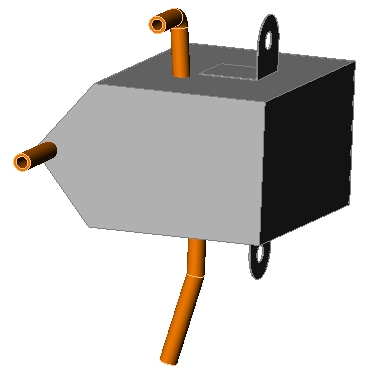
It's time to prepare the tubes. There are 3 tubes : one that allow the fuel to go the engine, one for the filling, and an another used to kow when the tank is full. For the first tank we won't discuss on the different ways to put the tubes inside. Iy's too early for this discussion, we could speak about this later.
The tubes are too stiff and often break during their bending. In order to bend the brass tube you just have to heat (red cherry) and suddenly recool by immersing in cold water. The alloy become softer and can easylly be bent. We use 3mm in external diameter brass tube, so you'll have to take a lot of care of not crushing it. The curving will be made by using tools of different diameters suitable to the places of the tube. On the following drawings you can clearly see the tubes, so if you follow this you'll get a reliable tank.
The holes in the tank for the tubes are made thanks to the etching needle (not with the drill) , in order to form a joint that will be helpfull during the soldering. The tube that has been heated is now oxidized and dirt. Don't forget to clean it with sand paper before soldering.
You now have to close the tank by soldering the second end and verify if there are no leaks. You can immerse the tank in the water and blow inside and check for the bubbles.
You just have to well clean the tank, once with alcohol, once with petroleum, and again with alcohol. The last step is to choose how you will fix the tank on the model (the simpliest is often the best).
